Photo: Standsome Worklifestyle / Pexels
Remote work is the practice of working at or from one's home or another space rather than from an office or workplace.
Found this helpful? Share it!
Our team reviews ergonomic furniture, desk accessories, and productivity tools so you don't have to. Every recommendation is based on real research: customer reviews, expert opinions, and value for money. Learn more about us →
Setting up a standing desk home office on a tight budget requires strategic choices that maximize both your health benefits and your wallet. Many remote workers want the ergonomic advantages of standing while working, but assume a quality setup demands thousands of dollars. The good news is that with smart planning and prioritization, you can create a functional, ergonomic standing desk workspace for several hundred dollars or less.
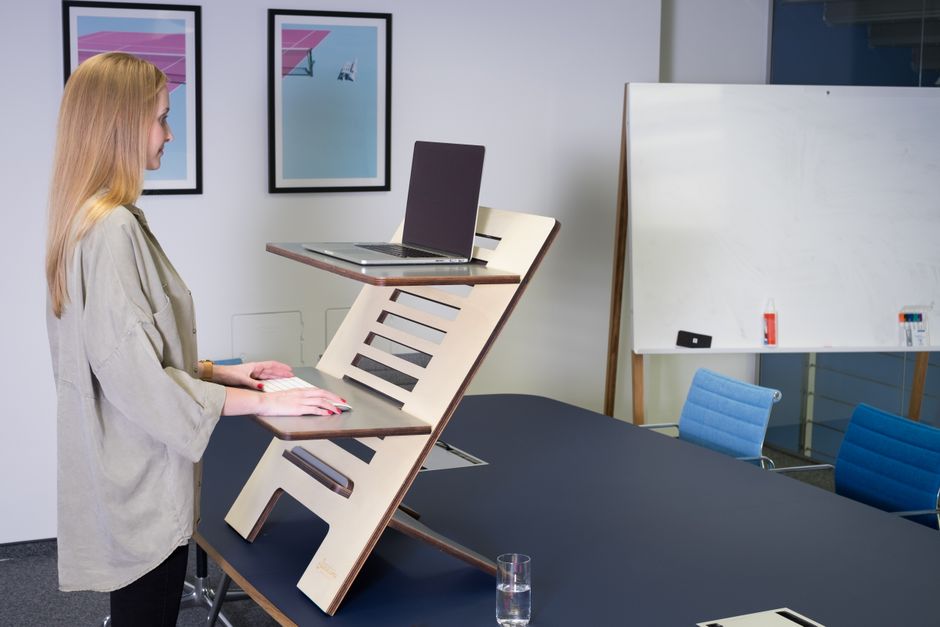
For tight-budget standing desk setups, we recommend pairing a manual crank standing desk converter ($150-200 range) with your existing desk, a basic monitor arm ($40-60), an anti-fatigue mat ($30-50), and a simple ergonomic chair or stool ($80-120). This combination—totaling around $300-430—addresses every critical ergonomic need without cutting corners on the fundamentals.
"The key to a budget-friendly standing desk setup is leveraging adjustable risers or monitor arms paired with a basic table, which can cost under $100 combined compared to $500+ for pre-made standing desks, while prioritizing ergonomic essentials like a supportive anti-fatigue mat and keyboard tray that deliver the highest ROI for comfort and productivity. I always recommend clients start with these foundational pieces and gradually add accessories like desk organizers and task lighting as their budget allows, rather than investing in expensive all-in-one solutions upfront."
Specifically, look for converters with at least 20 inches of height adjustment and a weight capacity of 50+ pounds, monitor arms with full articulation (not just tilt), and anti-fatigue mats with at least 0.75-inch thickness. Pair these with an adjustable stool rather than a full office chair if you're truly budget-constrained; you'll use it primarily for sitting breaks between standing intervals, reducing the need for a premium chair.
This approach works because it focuses your limited budget on the three elements that genuinely impact your health and productivity: the ability to alternate between sitting and standing, proper monitor height (which prevents neck strain), and support for your feet and legs during standing intervals. Rather than spreading a small budget across six different "nice-to-have" items, you're investing in the core ergonomic foundation. A $180 manual converter is biomechanically identical to a $600 motorized model—the only difference is the speed of adjustment, which doesn't affect the actual health benefits you'll experience.
Additionally, this setup scales beautifully as your budget grows. You can add upgrades later—like a motorized base, a premium chair, better lighting, or acoustic panels—without replacing your foundational pieces. Many budget buyers who start with a converter end up loving it so much they never feel the need to upgrade to a full desk. The converter approach also works for renters and small spaces, removing barriers that might otherwise prevent someone from experiencing the benefits of a standing desk setup.
Yes, you can use affordable adjustable desk risers or converter stands (typically $50-150) that sit on top of your existing desk to raise your monitor and keyboard to standing height. Alternatively, stacking books, boxes, or buying budget-friendly monitor arms can achieve similar results without replacing your entire desk.
Look for basic manual crank standing desk frames from brands like Flexispot or IKEA's Idasen, which start around $150-200, or check Facebook Marketplace and Craigslist for used electric standing desks. You can pair budget frames with a cheap plywood desktop or repurpose an existing table surface to stay under your budget.
While not essential, a budget anti-fatigue mat ($20-40) significantly reduces foot and back pain during long standing sessions and is worth the investment. If you can't afford one immediately, start by standing for 20-30 minute intervals and gradually increase as your body adapts.
Use what you already have: stack books, storage boxes, or drawers under your monitor and keyboard to achieve standing height, or use a wall shelf as a standing desk surface. This DIY approach costs nothing but requires some creativity and stability testing before committing to it full-time.
As an Amazon Associate I earn from qualifying purchases.
← Back to All Reviews| Retailer | Price Range | Shipping | Link |
|---|---|---|---|
| Amazon | Check Current Price | Free (Prime) | View on Amazon → |
| Walmart | Check Site | Free over $35 | Search → |
| Target | Check Site | Free over $35 | Search → |
Prices may vary. Click through to each retailer for current pricing.